3D Modeling and Book and Magazine Cover Art
filed in Book and magazine cover illustrations and artwork on Jan.30, 2016
Over the last couple of years, I’ve shifted from the (digital) painting of figures for book and magazine illustrations to employing 3D models in-house which I then use as references for painting the book cover figure.
The big plus of the 3D modeling is that I don’t have to start over should a client say, “Could you rotate him to the left.” With a regular painting, rotating the figure meant starting over; with a 3D figure, it’s pretty easy work with just a little painting over the figure to get him looking realistic. The old way meant starting over and hours or even a whole day wasted; the new way with 3D modeling can reduce the process considerably (though it still isn’t “instant” – ha).
The other advantage with 3D modeling / painting is that rather than sending the client crude, cartoonish sketches of a proposed character, I can now email low-resolution pictures with the lighting and shadowing in place, as well as various details, that make it close to what will be seen in the final version of the cover illustration. The client sees a much more polished and professional sketch rather than something that looks a little like something their 4th grader might bring home as an art project.
So where before, clients sometimes were alarmed at the crude sketches I sent (thinking the sketch reflected the level of work that would find its way to the final cover), now the 3D modeling allows me to paint/polish the 3D render a bit and send them something that promises to be very professional when finished.
No more panic.
No more having to reassure the client that the final painting wasn’t going to be a crude horror of a cover.
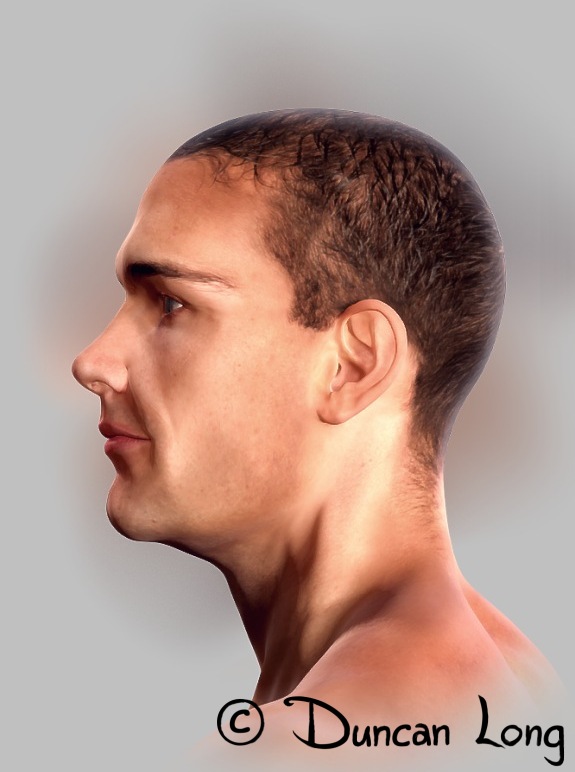
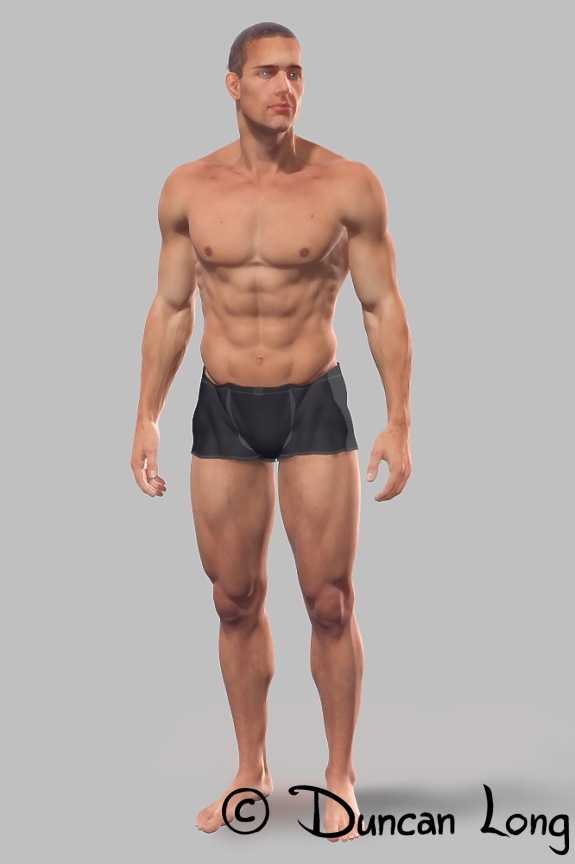
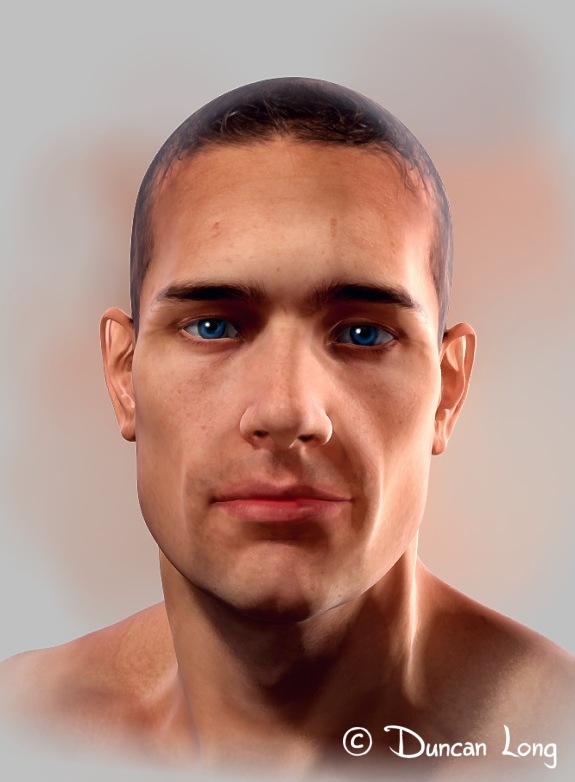
Once the 3D model is finished, I can not only generate the full-figure picture of it, but also rotate it for a profile and portrait closeup shot so the client can see exactly what the character looks like — and then ask for changes if the model isn’t quite what the client has in mind for the character.
For example, the figure shown here (produced for a project I’ve just started work on) proved to be a little too old, a little too muscular, and his face a bit too skinny. With the 2D painting like I used in the past, these changes would have meant starting all over. With a 3D model, it meant playing with a few “dials” for about an hour or so to reduce the muscle tone, fill in the cheeks, and reduce some of the lines in the face. I then rendered pictures of the new version, painted/touched them up, and emailed the new body/face to the client. Shortly I heard back from the client — and we had our new character, the guy the author wanted on his book cover.
For me, the process of using a 3D model has become pretty painless, without the frustration of having to start all over to finally get to where the character needed to be should my vision not jive with that of the client.
Don’t get me wrong — 3D modeling still entails a lot of work. And it has taken me about two years to get to where I feel like I’ve mastered the process to the point that it is useful for my illustration work. But now that I’ve reached this point, all that time and work is paying off. The process is smoother and, just as importantly, gives professional results at the “sketch” level.
And when a client says, “Could you raise his right arm a bit and rotate him 45 degrees to the left?” it’s no long a hair-pulling crisis.
=====================
When not playing with his 3D models, Duncan Long works as a book and magazine illustrator and sometimes author. You can learn more about his illustration work (and see samples of book and magazine covers he’s created) at Duncan Long’s Online Gallery.
January 30th, 2016 on 11:13 am
Hi Duncan,
These are good. Like, I’ve been watching you progress over the last two years and the examples here are a real improvement over some of your early models.
You know that 3D character modelers are in high demand in the gaming industry, right? Both in full-time employees and contracting.